We use cookies to improve your experience and keep DungeonFog running smoothly. Accept all cookies or customize your choices. Details are in our Privacy Policy.
(Still no real cookies, sadly.)
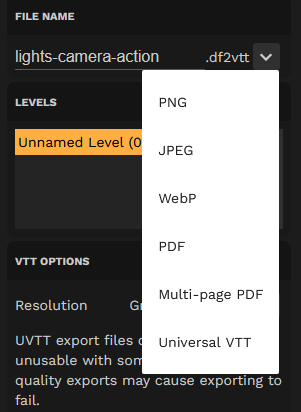
To begin we need to export our map, you may do this by selecting 'Universal VTT' as the export map type and then export your map normally.
Once your map is exported you will need to open Foundry VTT and follow the steps to install the importer.
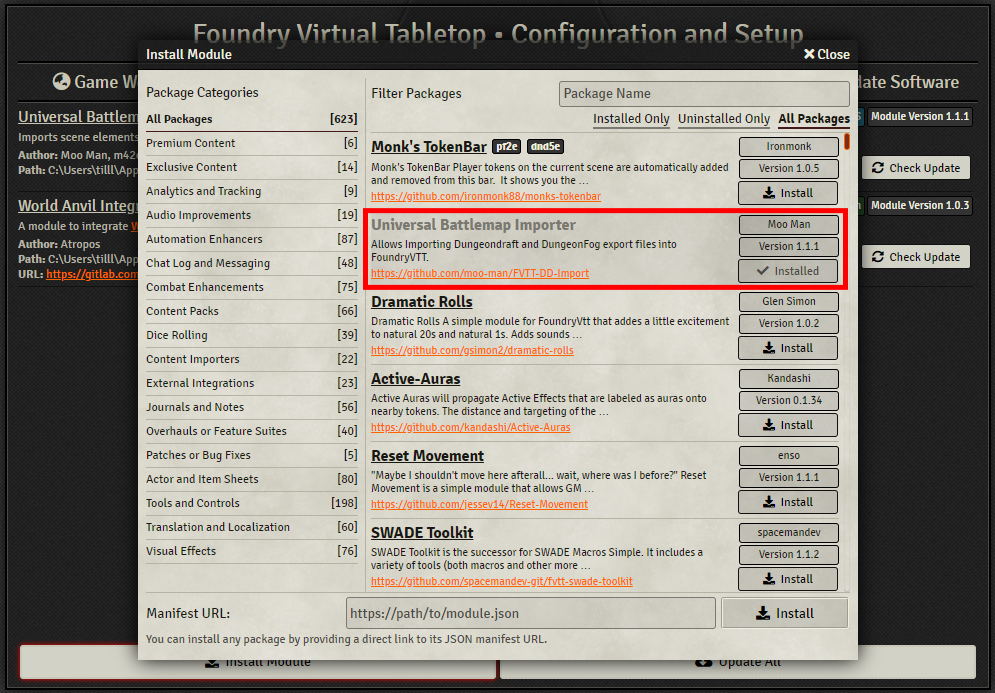
Once the module is installed we need the enable the module in the world:
Now that Found VTT is setup to import the map we can being to import our map.
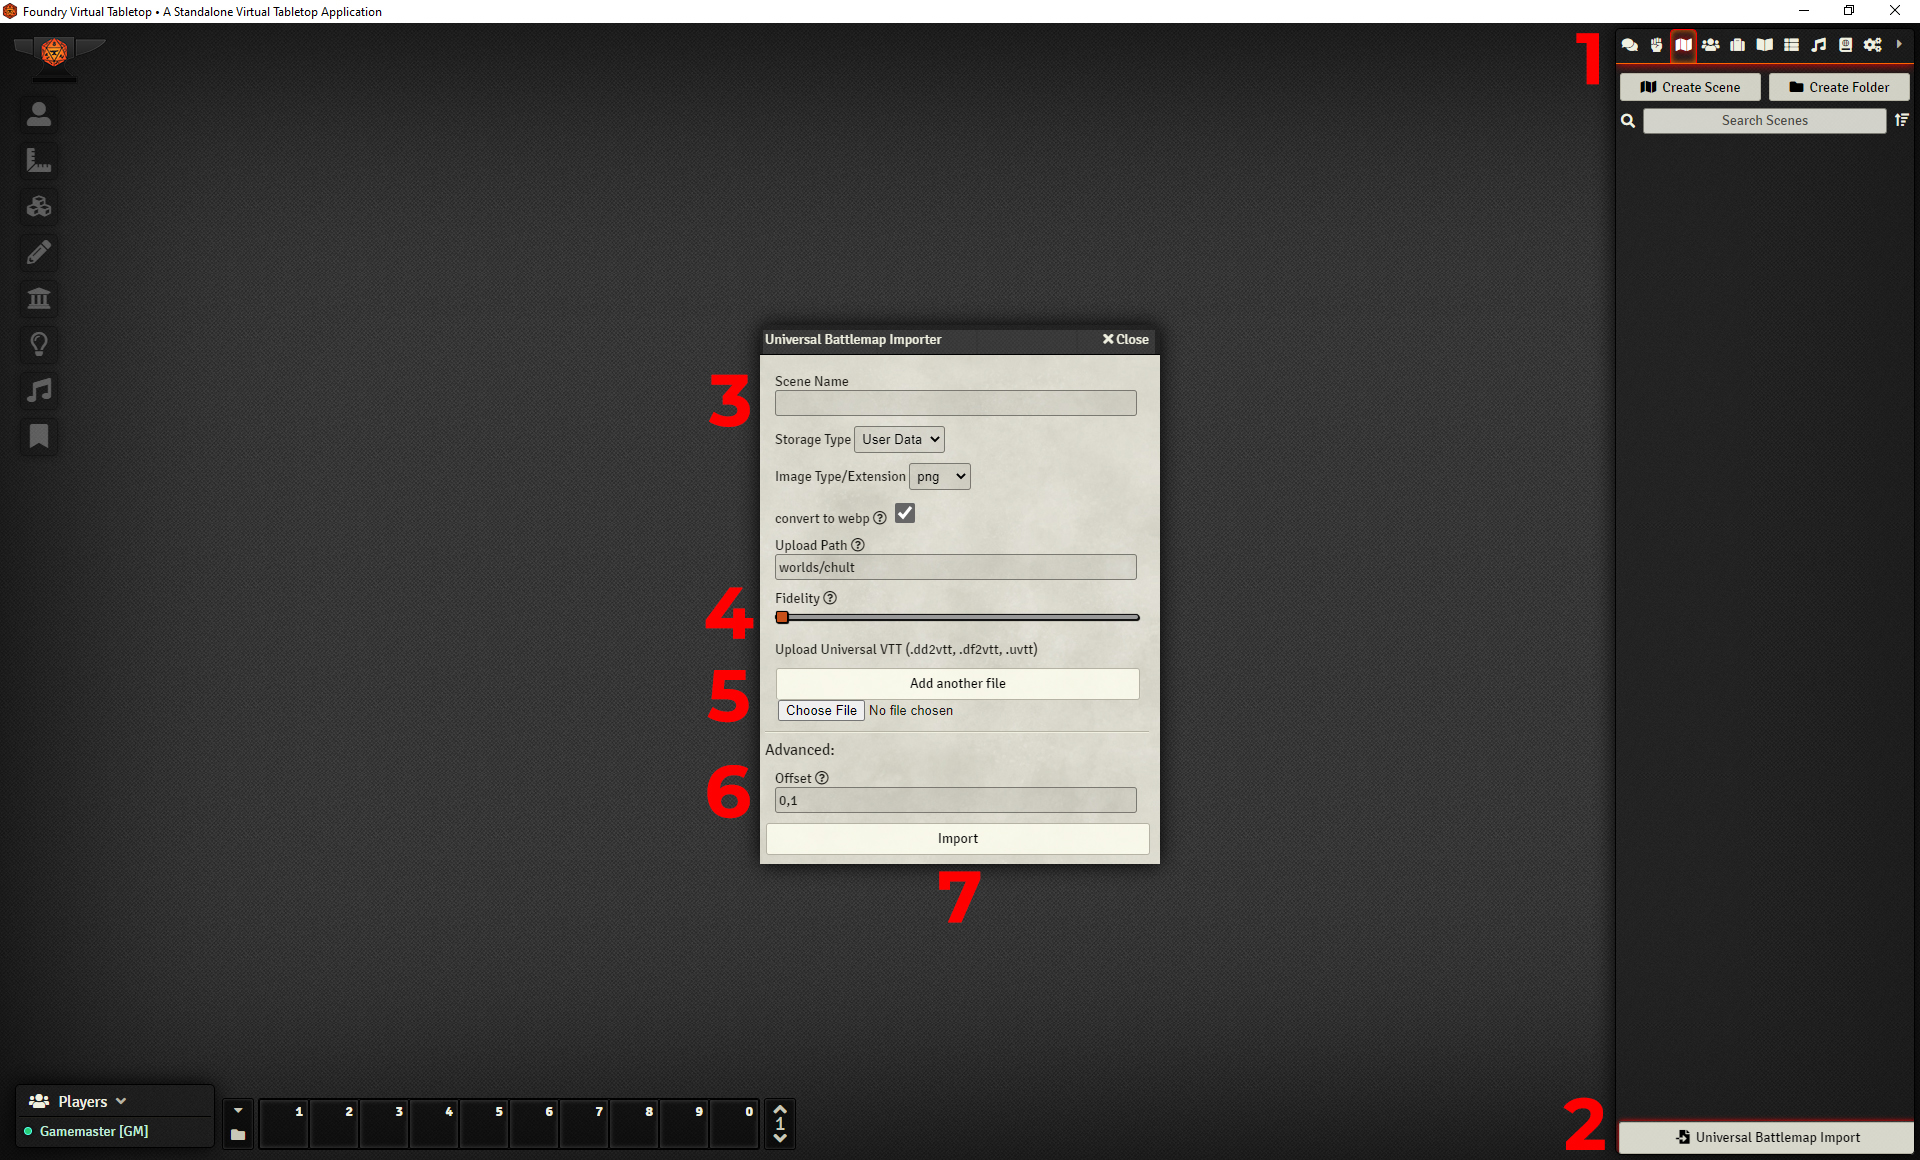
Step 1 - Click on the 'Scenes Directory' tab in the upper right hand corner
Step 2 - At the bottom click the 'Universal Battlemap Importer' button
Step 3 - Optional - You can enter the name of the level, if no name is entered this will default to the name used on export.
Step 4 - While base fidelity should be fine, increasing the fidelity slider will create more wall points. If you have shaped walls and the wall points are not accurate enough, please re-import your map with a higher fidelity setting.
⚠️ Please use cation when selecting a higher fidelity as too many map points can cause lag within Foundry VTT.
Step 5 - Choose and select the file for the map you will be importing. Multiple maps can be imported at once.
Step 6 - Set Offset to 0 (default to 0.1)
Step 7 - Import your map